Installing Raspberry Pi OS Lite

Raspberry Pi OS Lite Installation

How to install Pi OS Lite on Raspberry Pi using Imager.


SD Card Preparation

For this project, you will install Raspberry Pi OS Lite, as a desktop environment is not required.
You will do this using Raspberry Pi Imager.
To install Raspberry Pi Imager, go to the Raspberry Pi Imager website and download the version for your PC.
Connect your micro SD card to your PC.


On Windows

On Windows, after downloading the .exe file, install it and open Raspberry Pi Imager.


On Linux

On Linux, I recommend downloading the AppImage version. Once downloaded, modify the file properties to make it executable and run the following command, adjusting "your user/your download folder" and the version number.


sudo '/home/your user/your download folder/Imager_2.0.0_amd64.Appimage'


In the windows that open, select the following options:
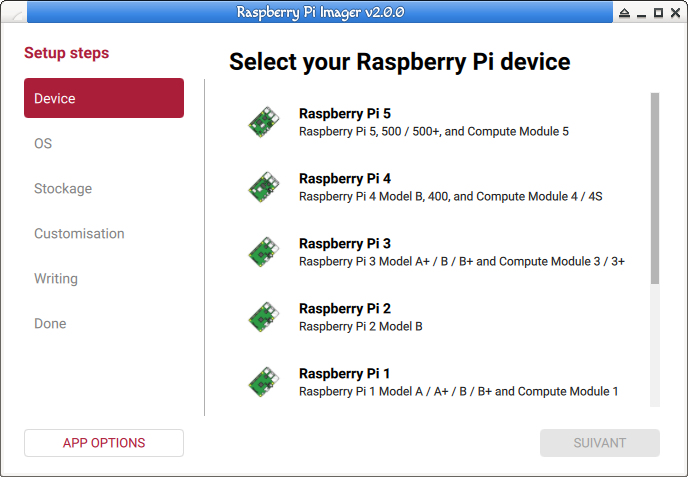
Choose the Raspberry Pi model.
Step 1: Raspberry Pi Device Selection (e.g., Pi 3B)


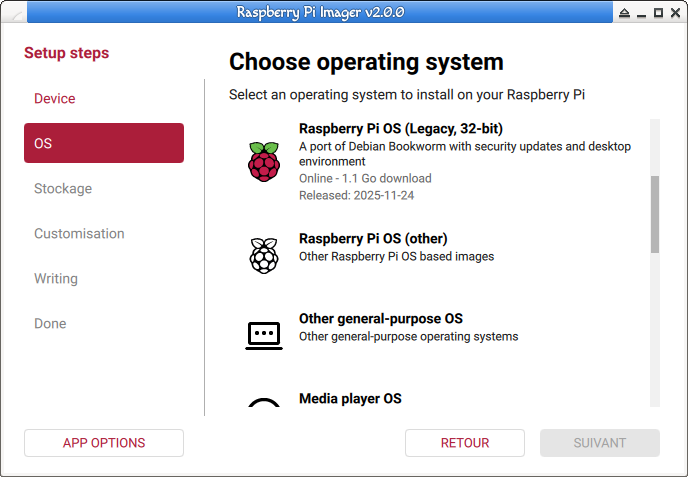
Raspberry Pi Imager, Choose Raspberry Pi OS (Other).
Step 2: Choose "Raspberry Pi OS (Other)".


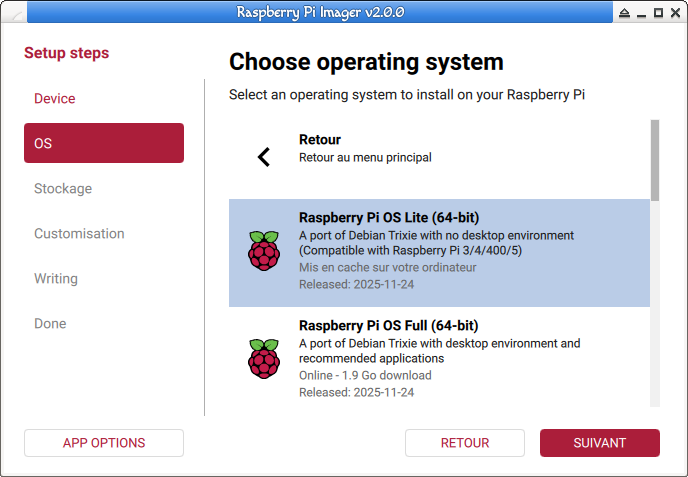
Raspberry Pi Imager, Select Raspberry OS Lite (64 or 32-bit depending on your Pi).
Step 3: Select Raspberry Pi OS Lite (64 or 32-bit depending on your Raspberry Pi).


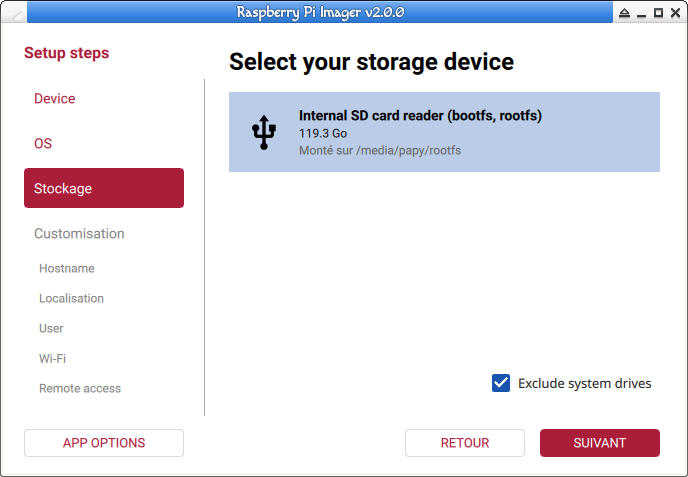
Raspberry Pi Imager, Select your micro SD card.
Step 4: Select your micro SD card.


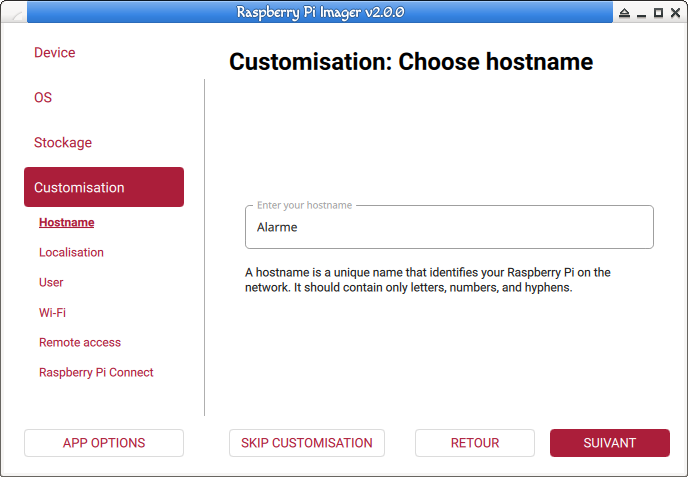
Raspberry Pi Imager, Give your system a name.
Step 5: Set your system hostname.


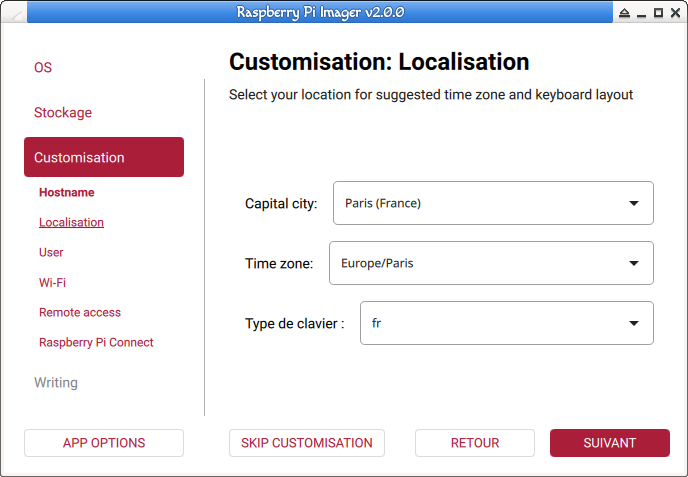
Raspberry Pi Imager. Select your country, timezone, and keyboard layout.
Step 6: Select your country, timezone, and keyboard layout.


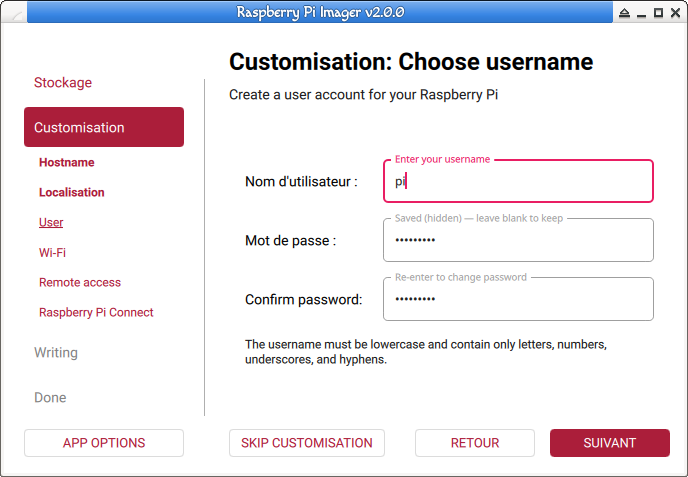
Raspberry Pi Imager. Choose your username and password.
Step 7: Set your username and password.


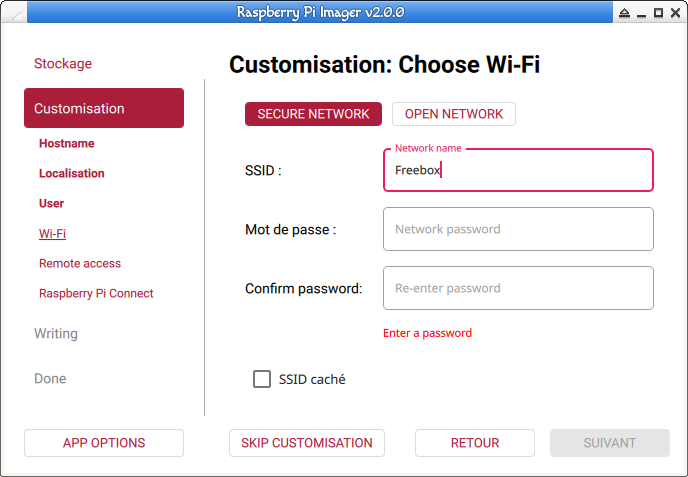
Raspberry Pi Imager. If using Wi-Fi, enter network name and password.
Step 8: If using Wi-Fi, enter the SSID and password.


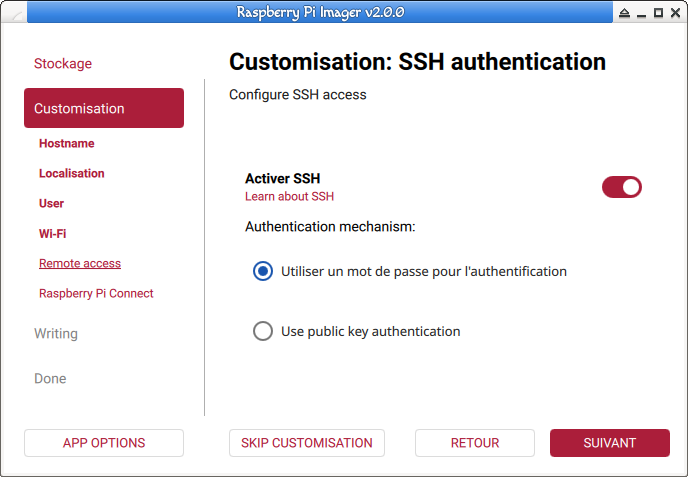
Raspberry Pi Imager. Enable SSH connection.
Step 9: Enable SSH services.


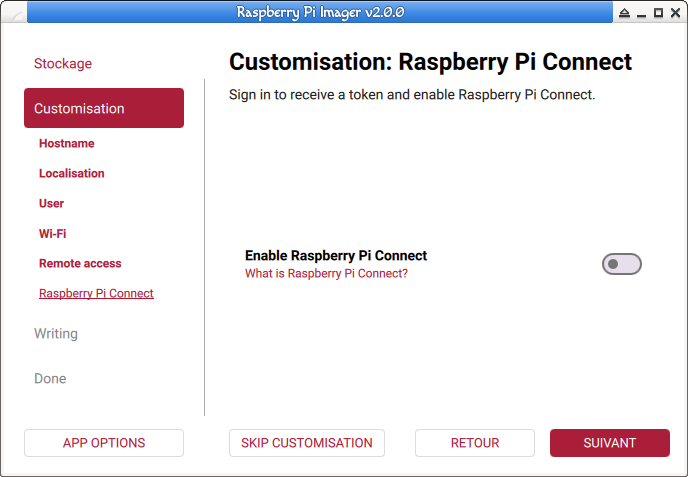
Raspberry Pi Imager. Enable Raspberry Connect (optional).
Step 10: Enable Raspberry Connect (optional).


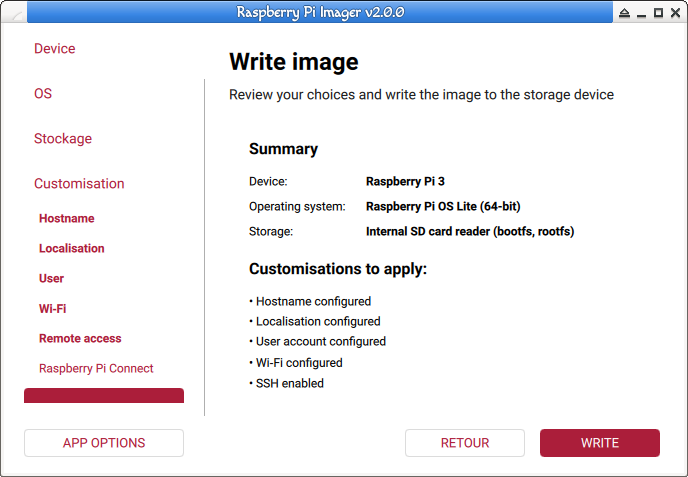
Raspberry Pi Imager. Verify options before starting write.
Step 11: Verify OS customization settings before writing to the card.


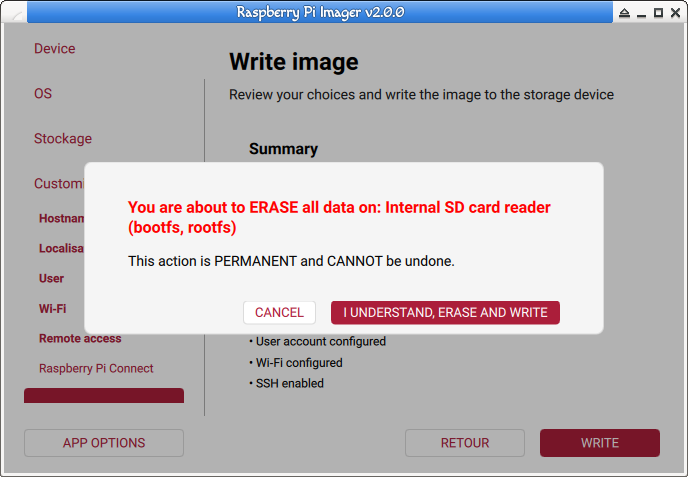
Raspberry Pi Imager. Confirm erasure and writing.
Step 12: Confirm disk erasure and start writing.


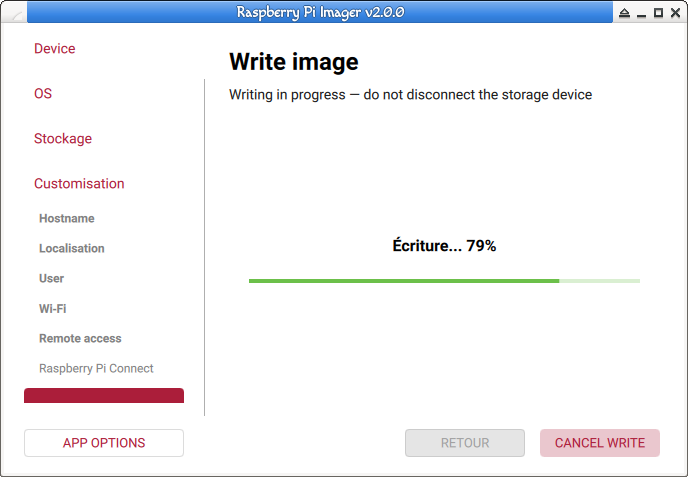
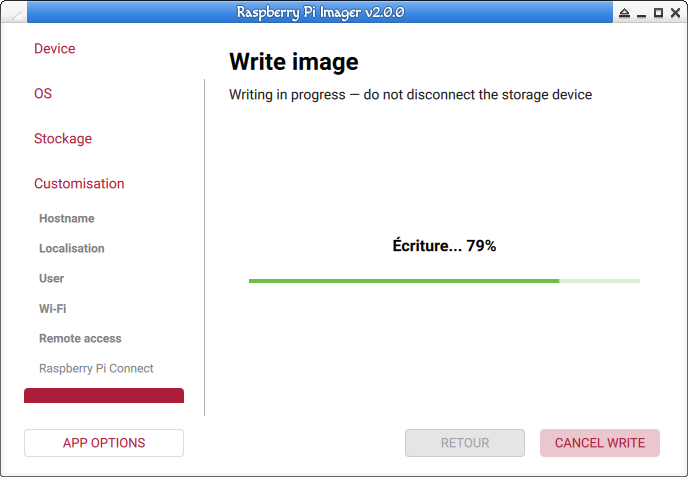
Raspberry Pi Imager. Wait during writing process.
Step 13: Please wait while writing the OS.


Raspberry Pi Imager. Wait during verification.
Step 14: Please wait while verifying the write.


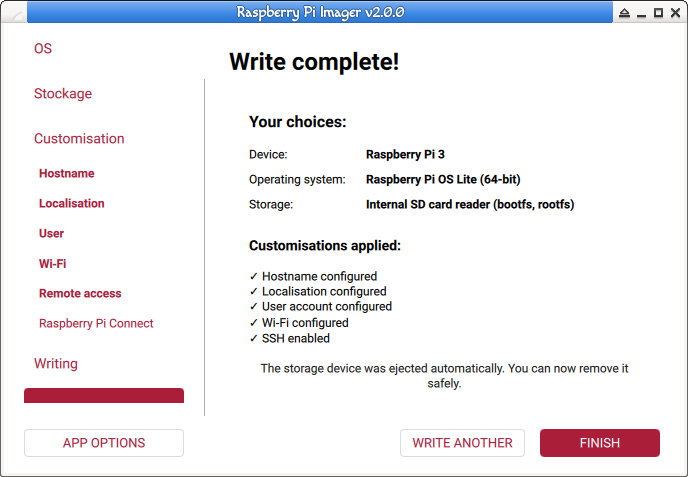
Raspberry Pi Imager. Click "FINISH" and remove your micro SD card.
Step 15: Click "CONTINUE" and remove your micro SD card.


⬅️ Back to previous page